Thursday, June 28, 2012

Center Series from Pocket Full of Kinders-Part 3

Hiya Peeps
 
Shuna P from Pocket Full of Kinders here!


Did you miss me?
Aww shucks you did miss me
Now I feel special
If you didn't miss me just pretend you did
 
Today is my 3rd installment of the center series
 
for Lacey


Once you have set up your stations and organized them what is next?
 
Today we are going to talk a little about how to manage stations so that they will run smooth and effectively for the entire year
 
 
Are you ready?
 
 
This might get a little long
 
 
When I set up my centers I also determine my center jobs for my students
 
These are different from classroom jobs
 
 
Here are my center jobs
 
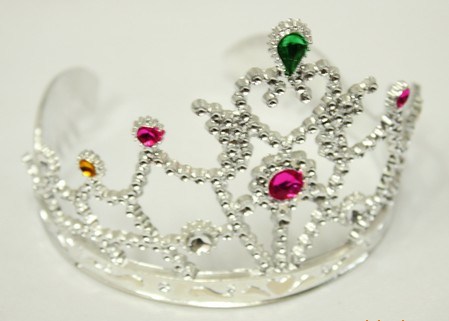
* Center Captain: The center captains are responsible for getting their center card and their center bucket. The center captain gets to wear a special hat and is the only person in that group allowed to disrupt my station or my TA's station if there is a question


*Material Master: The material master is responsible along with the center captain for putting all material back into their bucket and cleaning up.
 
* Noise Monitor: simply put they monitor the noise level
 
If a group gets too loud and is playing in their center the center captain loses their hat and that group can't get their number for their BINGO Board
 
I start the year off with a Ten Frame chart with numbers on it as a reward system
 
If the center groups are on task they get to pull a number and cover the number on their bingo board
 
When they get all numbers filled on the board they have a small treat such as popcorn for snack
 
As the students get better in stations I begin to use a 20's chart, 50's chart and finally after Christmas I use a 100's chart to manage center behavior
 
 
This is the same idea as behavior bingo I just called mine Center Bingo
 
Works pretty well for me
 
 
----------------------Chirp--------------------------
 
The next thing that I noticed that tends to make my centers run smoothly is using center signs


These are posted around the room and are also written on students center cards that the center captains use
 
I use a sheet protector wrapped in duct tape stuck to the wall to slide the center signs in
 
Each of my center groups has a name
 
I had a jungle theme classroom last year so all of my center names where jungle themed
The large picture cards are my center group names. At the beginning of the year the center captains would come in and look at their group picture and see what two centers they would go to for that day
 
The books are my guided reading groups
 

The two books at the top showed what groups I would get for that day
 
I would see each of my reading groups 3 times each week


This worked pretty well but I did not like that they numbers were so small and some of my groups forgot where they were supposed to go causing some confusion so I changed it a little and I was so much happier with the results.
 
I like this system much better and I am going to use it again next year
 
Sorry I don't have a picture of them in the pocket chart so I had to improvise
 
 
Here are my center group cards
 
Don't worry about the numbers along the side they were from a previous management system that I used but didn't like so well


On the back of each card is the student's numbers who are in that center
 
Helps me out when I am rotating center captains plus I had a couple of students who for the life of them could not remember what center group they were in
 
With 30 kiddos it was hard for me to keep track
 
Problem solved

Instead of using the number cards from the earlier pic I used some ready made center cards
 
The small black numbers on the cards are the center number that match the numbers on the large center signs.
 
These are the cards that the center captains get to tell what station they go to,


In my pocket chart the animal cards are next to the center cards
 
 
So using this system in the pocket chart the giraffe center captain will come get their card and go to station 10
 
Lions would go to station 6
 
Monkeys will go to station 2
 
When it is time for students to go to their next center they will just rotate to the number that comes after. Remember my stations are set up in a circle so the next station is right next to the station that students are already in. So giraffes will go to 11, lions would go to 7 and monkey would go to 2
 
 
Here is a look at how the cards would be arranged in a pocket chart so when I get ready to assign students their centers for the next day all I would have to do is rotate the cards up


The first group will always start in center 1  in this case it is giraffes. I do centers on Tuesday, Wednesday and Thursday. On Tuesday the first group, the giraffes, will go to Station 1 and when the next rotation is called they will go to station 2.
 
 
On Wednesday when we get ready to go to the next station I just simply take the cards 1 and 2 from the top of the pocket chart and move all the rest of the cards up! The giraffes will now have the station card that says station 3
 
 
This is by far the simplest management that I have tried and it worked really well last year!
 
Crystal?
 
 
Okay enough of that
 
-------------------Chirp-------------------------
 
Now what do you do with all those recording sheets?
 
I used recording sheets in just about all of my stations and I do not like the kiddos bringing all those sheets to me at one time so.......................
 
 
Each student has a center folder that they put all of their recording sheets in and their guided reading books in
 
 
These made it ALMOST till the end of the year
 
The students just slid in all of their center work and guided reading books
 
At the end of each day I would check them and give stickers to the ones who completed their center work. On Friday if the students did not get a sticker on their work they went back to that center
 
On all of my center recording sheets I write the station number in the top corner so when the students have to go back and complete work they know which station to go to!
 
After we cleaned up stations the students would put their folders back into a pocket chart attached to the back of our door
 
* sorry my pinkie is in the pic*
 
Next year I think I might use these folders that I got from Target to see if they hold up better


Alright peeps I think I have rambled enough
 
Make sure you check back next week for a center goodie bag
 
What would you like to see in the goodie bag?
 
 
If you missed the other two post you can click here and here
 
Till next time
 
When you have time come and visit me sometime
 
Peace out Peeps


Pin It

Tuesday, June 26, 2012

Welcome Tessa from Tales Outside the Classroom

Tessa

Fluency is an often overlooked aspect of reading instruction.  I know that I was guilty of it for a long time.  I would try to throw in a Readers Theater on weeks that were "off" and we couldn't do our normal routines.  I would talk to the kids about "reading like they were talking" but didn't focus a lot on it.

A few years ago I went to the National Conference for Literacy Learning put on by SDE.  I heard Tim Rasinski speak.  Everything he said just made so much sense.  I bought a couple resources from him and the ideas started flowing.  Because I did reading instruction with a large group of students who were below grade level, I needed to try some different ideas and the ideas I got from this workshop were great.

One big idea I introduced was using the Fry sight word phrases.  Previously, I had used sight words, but hadn't done much instruction with the phrasing.  I took each list and broke it down into 4 chunks.  I then created a Powerpoint for each chunk.  When students finished with their work early, they went over the computer, and read through the PPT with the phrases.  They would whisper them to themselves.  When students felt they could read the phrases with fluency, they called me over to listen.  If they read them well, they moved to the next list.  I made it a challenge for my students by offering small rewards when they made new achievements.  For example, the first student to make it all the way through would get a new book of their choice from me.  Because these were struggling students, I was happy to use a book as the dangling carrot for their hard work.

Another method I used, with my younger students, were games with the Fry phrases.  I created a baseball game that I used in my small groups.  I've updated the game and posted it in my TpT store.  You can get the game for List 1 of the Fry Phrases for FREE.  Just click the pictures below.


I hope I've been able to give you a few ideas on how you can use the Fry Sight Word Phrases in your fluency instruction!


Tessa Maguire is a former reading teacher and differentiated instruction coach.  She currently is in a dual role administration and curriculum coaching position.  She spends her days helping her K-3 teachers find what works best for them and their students.  She blogs about the resources she finds and creates and she shares tips and strategies for effective instruction.  You can find out more information on her blog Tales from Outside the Classroom: http://talesfromoutsidetheclassroom.blogspot.com
 

Thursday, June 21, 2012

Center Series from Ms. Patterson: Pocket Full of Kinders

It's me again
 
Ms. Patterson from Pocket Full of Kinders
 
 
I am so happy to be joining you again
 
Okay let me first apologize for missing the centers post last week
 
I had a family emergency that came up that caused me to have to go out of town unexpectedly
 
Everything is okay now
 
Now that we have gotten all the logistics out of the way we can get down to business


I must warn you this post is all over the place!

Proceed with extreme caution
 
Today we are going to talk a little about organizing centers.
Again I am no expert but I would like to share what works for me
The first thing I do when I plan for stations is to write down all my ideas and thoughts so that I can have them to refer to
 
 
I have journals that I use to write down all my ideas as I get them.
The yellow folder is for math centers and the green one is for reading centers
I like being able to take the journals wherever I go and I can quickly jot down ideas as they come
The black and white journal is one that I leave at home and the colored ones stay at school


*sorry about the pic being sideways*
 
 
IF you could just turn your head to the left for a second you will see that I organize my book by each week.
Under each week I have the Stations/Centers that I will be using
I write a quick description of the activity that I want to have in that station that week and even draw a pic so that my brain will remember what exactly I was thinking about
 
My brain is funny like that
 
I never remembers what I tell it!


My reading center idea book
 
I use sticky notes a lot to go back in fill in gaps in my thinking


I like having the journals because they allow me to organize my thoughts and I can refer back to them often.
 
After I have written down all of my centers I begin to gather materials that I will need to implement all of my stations.
 
------------------Chirp------------------------
 
This is how I store my centers 
This picture is from Growing Kinders but I also use the plastic storage contains, mine are a little larger than these, to store my centers
These storage buckets are for ME
 
Me, Me, Me
 
the students do not use these buckets


This is how I organize my center material so that when I get ready to set up a center all I have to do is go and pull the activity
 
Inside each of my labeled tubs are activities to go along with a specific topic or theme
For example I have an ABC tub and inside the tub are  folders for each letter of the alphabet and games for each of those letters. So if I am doing a ABC station on the letter A all I have to do is pull the letter A folder and put it in the students center bucket with any manipulatives that they might need


Another way that I store material is in those file box things
 
 
Inside these boxes are all my file folder games as well as my envelope centers and ziploc bag centers
For most of my centers that I make I cut them and store them in a ziploc bag or folder
The boxes have larger folders in them that I use to sort by themes
 
Inside each larger folder are smaller folders that each contains games related to a theme


Here is a better look at the folders that are inside the box
 
This is a folder inside the reading box. This is a game for word families I think so it is in a larger folder labeled word families with other games that cover the same skill


Inside the folder all some of the games that cover word families as well as the pieces that go along with that game

Another example of what is inside the box
 
This would be in the alphabet folder


This would be in the math bucket in the folder labeled numbers


This would be in the math box in a folder labeled addition
 
Another storage option is
 
 
Pencil pouches!
 
These are also stored in the box
 
 
Now when I get ready to set up my stations all of my material is in a central location and all I have to do is pull the material to put in the students center bucket
 
No more running around like a chicken with its head cut off
 
 
Thanks for listening to or rather reading my ramblings
 
Peep out Peeps!

Pin It

Wednesday, June 20, 2012

Reading…and a Tiara?

Reading and a tiara.  Wondering how the two relate? 
Head on over to Ms. Kerri and Her Krazy Kindergarten to hear all about it!  I’m guest blogging for her today while she is on her honeymoon!


Ms. Kerri and Her Krazy Kindergarten
Let me know what you think!
Signature copy

Tuesday, June 19, 2012

Welcome Tangelia from Buggy in Kindergarten: Classroom Management!

Tangelia

Hey everyone! It's Tangelia from Buggy In Kindergarten here! I am so excited to be blogging over here for Lacey today!  Lacey, thank you for having me over here at your wonderful blog!

When Lacey and I started talking about me guest blogging, we discussed the topic of classroom management. 

The first thing that I thought of was behavior. What do I do to help keep those little munchkins angels behaving? Well my advice is to first MODEL, MODEL, MODEL those behaviors that you want them to do. Explicitly teach them what they are supposed to do and what they should NOT do. Think about how you want them to act in centers, during carpet time, while they are working independently.

In my class I expect my students to listen, to follow directions the FIRST time given, to work quietly, to put things back where they belong, and to keep their hands to themselves. Every morning we go through these rules. We talk about WHAT they mean and WHY they are important! 

My students know the rules.... HOWEVER that does not mean that they always follow them. So what do I do in this case? Well I am a firm believer in warnings. The first thing I always do is to give a warning. Sometimes this is all that child needs and their behavior is much better the rest of the day! But then you have those stinkers students that just don't get it. They keep repeating the same behavior. In this case, my students have to mark a star. Each star has its own consequence. 

If they mark one star they lose 5 minutes of recess. Two stars 10 minutes of recess. Three stars they lose 15 minutes of recess, and if behavior is disrupting class progress, they go to timeout. At four stars they have no recess and have a letter going home to their parents about their behavior. 

I used this system mainly because I thought I HAD to! This is the behavior system that all of the teachers on my team use. However it just doesn't work for me. This year I am changing my behavior system to something that I am much more excited about! 

Some of you probably use it! It is the clip chart system! (Click on the picture below to get your very own copy of my clip chart system for FREE!)

Here are the reasons that I love this type of behavior system. 

1) It focuses on the behavior you WANT to see instead of just the behaviors you DON'T want to see!
     In the past it has felt like all I was able to focus on is the negative behavior in the classroom. This means that these children get the attention. Yes, it is negative attention, but it is attention nonetheless. Using this behavior chart, I will be able to pick out and praise and reward those positive behaviors that I want to see.

2) It gives students to ability to climb back up if they have had a bad morning but a great afternoon!
     A student's behavior is affected by so many factors. Their life at home may be negative. They could have seen something on the bus that affected them. There are so many things that we do not see in a child's life. I believe that sometimes these things cause student's to misbehave. So say a student comes in one morning and begins acting up, you warn them, maybe you give them another warning, but they don't quit that negative behavior. They have to move a clip. Once they move that clip they think about their behavior, they realize that it was inappropriate, and they become that angel that you knew they could be. They begin exhibiting positive behaviors, that child may move their clip up. Therefore reinforcing those positive behaviors and encouraging them to do better.

3) It offers POSITIVE REINFORCEMENT instead of just NEGATIVE REINFORCEMENT!
    If you are looking for students that are behaving like they should be they DESERVE to be praised. Letting them move their clip UP reinforces their positive behavior. I LOVE this! 

4) All students start on green "Ready to Learn" EVERYDAY!
    Each and every day a child deserves to begin fresh... to have a clean slate. Using this behavior chart, each and every day students get to SEE that they are on green. Seeing this shows them that "Today is a new day."

I am really excited to get to use this new chart in my classroom this year. I look forward to rewarding those students with positive behavior instead of just focusing on negative behaviors!

Lacey, thanks again for having me today! I hope all of you enjoyed hearing my take on the Clip Chart Behavior System. I would love to see you over at my blog, Buggy In Kindergarten!

-Tangelia

Monday, June 18, 2012

Welcome Nicole from Rowdy in Room 300: Alphabet Organizer

Nicole
Hi everyone!
I'm Nicole from Rowdy in Room 300! I'm so glad that 
Lacey has allowed me to be here with you guys today!
clip_image001
I like knowing who I am reading about.. so that's me! 
I teach Kindergarten in Texas and love love LOVE it! 
I have been crafting and creating like CRAZY this summer to make up for all that lost time in the school year :) I was at Hobby Lobby last week picking up some supplies to make this hall pass. Have you seen it?! THEN, I was browsing around and there was this little gem just calling out my name..
clip_image002
I know.. you're thinking "WHAT?! The Christmas stuff is out already?!" Yessiree it is! We can always count on Hobby Lobby to have their seasonal stuff out waaay too early! Anyway, I was SUPER excited, not because I've been needing an Advent calendar, but because I need a way to organize my letter tiles, don't you?! That tub they come in is just not sufficient - your kids are looking for letters without any success and they all get dumped out or strewn across the table, are ya with me?! 
Plus, I used a 40% off coupon so got it for only $7, can you get any better than that?!
So I snagged it up and forgot all about the hall pass!
First, I spray painted it hot pink 
(I had some leftover from painting those toolboxes everyone's making right now)
clip_image003
{I managed to only get a few little bugs stuck in it - ha!}
Then I painted each individual box. I didn't worry about the bottoms or backs of the boxes, no one sees that part. I just painted the front and each side. I chose to use the same colors my room is decorated with.
clip_image004
Are you a craft paint hoarder like me?! I have a whole tub full of them!
clip_image005
While I was at it, I painted a few little zebra stripes along the sides.. they just needed a little something more. 
clip_image006
Then I made up some cute little ABC labels {I'm sharing... just wait till the end!} and decoupaged them to the little boxes.
clip_image007
Here's the completed project - I'm SO stinkin' excited to add it to my room!
clip_image008
clip_image009
Plus, I won't have to dig around for the letter I need during word work or have my kids digging endlessly through that tub!
It was well worth the 2-ish hours I spent making this (most of that time was watching the paint dry! Oh, and chasing my two kiddles around :)
Here are the labels if you'd like to use them! I'd love it if you come visit my blog!
clip_image010
clip_image011

LinkWithin

Related Posts Plugin for WordPress, Blogger...